
Gluten Free Red Velvet Waffles are a delightful way to enjoy the classic red velvet flavor in a breakfast (or brunch!) format. This recipe provides a delicious and easy way to create perfectly fluffy and vibrant waffles without gluten, making them a fantastic option for those with dietary restrictions or anyone seeking a special treat.
Key Ingredients for Gluten Free Red Velvet Waffles:
- 1 ½ cups gluten-free all-purpose flour blend (ensure it contains xanthan gum if your blend doesn’t)
- 2 tablespoons granulated sugar
- 1 teaspoon baking powder
- ½ teaspoon baking soda
- ¼ teaspoon salt
- 2 tablespoons unsweetened cocoa powder
- 1 teaspoon white vinegar
- 3 tablespoons vegetable oil (or melted unsalted butter)
- 1 cup unsweetened almond milk (or other milk of choice)
- 1 large egg, at room temperature
- 1 teaspoon vanilla extract
- 1-2 tablespoons red food coloring (gel or liquid, adjust for desired vibrancy)
- Optional: cream cheese frosting for topping
How to Make Gluten Free Red Velvet Waffles:
Whip up these delightful Gluten Free Red Velvet Waffles in under 30 minutes, promising a breakfast that’s as visually stunning as it is satisfying. The recipe is remarkably simple, calling for common pantry staples and yielding a rich, tender crumb with that signature red velvet tang. Prepare to be impressed by the ease and incredible flavor, making every bite a pure joy.
Step-by-Step Instructions:
- Preheat your waffle iron according to the manufacturer’s instructions. Lightly grease it if necessary, even if it’s non-stick.
- Whisk together the dry ingredients in a large mixing bowl. This includes the gluten-free all-purpose flour, granulated sugar, baking powder, baking soda, salt, and unsweetened cocoa powder. Whisking ensures that all the leavening agents and flavorings are evenly distributed, preventing pockets of blandness or uneven rise.
- In a separate medium bowl, whisk together the wet ingredients. Combine the white vinegar, vegetable oil (or melted butter), unsweetened almond milk, the large egg, and vanilla extract.
- Add the red food coloring to the wet ingredients. Start with 1 tablespoon and mix well. If you desire a more intense red color, add the second tablespoon and mix again until you achieve your preferred vibrant hue. The vinegar in the batter reacts with the baking soda, contributing to the waffle’s fluffiness and helping to activate the red color for a deeper shade.
- Pour the wet ingredients into the dry ingredients. Stir gently until just combined. Be careful not to overmix, as this can lead to tough waffles, especially in gluten-free baking. A few small lumps are perfectly fine.
- Let the batter rest for about 5 minutes. This brief resting period allows the gluten-free flours to hydrate, leading to a better texture.
- Pour the batter onto the preheated waffle iron. The amount of batter needed will vary depending on the size and type of your waffle iron. Generally, about ½ to ¾ cup per waffle is a good starting point.
- Cook the waffle until golden brown and cooked through. This typically takes between 4 and 7 minutes per waffle, depending on your waffle iron’s settings. The steam should subside, and the waffle will usually lift away easily when done.
- Carefully remove the waffle from the iron using a fork or spatula and place it on a wire rack to keep it crisp. Repeat with the remaining batter, re-greasing the waffle iron if needed between batches.
Why You’ll Love This Gluten Free Red Velvet Waffles:
You’ll absolutely fall in love with these Gluten Free Red Velvet Waffles for so many reasons! First, their stunning crimson hue and decadent flavor are a guaranteed showstopper, making any breakfast feel like a special occasion. They’re incredibly budget-friendly to make at home compared to specialty bakery options, offering a delightful taste of luxury without the hefty price tag. The subtle tang from the vinegar and the rich cocoa notes create a truly irresistible flavor profile that perfectly complements sweet and creamy toppings.
Imagine the joy of sinking your fork into a fluffy, warm waffle that also happens to be gluten-free – it’s pure breakfast bliss! Unlike basic buttermilk waffles, these offer a unique, festive twist that’s perfect for holidays or just brightening up a Tuesday. Don’t miss out on this incredible treat; gather your ingredients and whip up a batch of these delightful Gluten Free Red Velvet Waffles today!
Storing and Reheating Tips:
Leftover Gluten Free Red Velvet Waffles can be stored at room temperature for up to two days, but for longer freshness, refrigeration is recommended. Allow the waffles to cool completely before storing them in an airtight container or a well-sealed zip-top bag. They will stay fresh in the refrigerator for up to 3-4 days.
To reheat your waffles, the best method for optimal crispness is in a toaster, toaster oven, or a conventional oven preheated to 350°F (175°C). Place the waffles in the toaster or oven and heat for a few minutes until warmed through and slightly crisped. You can also reheat them in a microwave for about 30-60 seconds, but they will be softer. For future enjoyment, you can freeze your cooled waffles. Simply wrap them individually in plastic wrap, then place them in a freezer-safe bag or container. They will keep well in the freezer for up to 2-3 months.
Final Thoughts:
These Gluten Free Red Velvet Waffles are a truly magical way to start your day with vibrant flavor and a touch of indulgence. They’re remarkably easy to prepare, proving that gluten-free baking can be both delicious and accessible. Give them a try, and you’ll be amazed at how wonderfully they turn out!
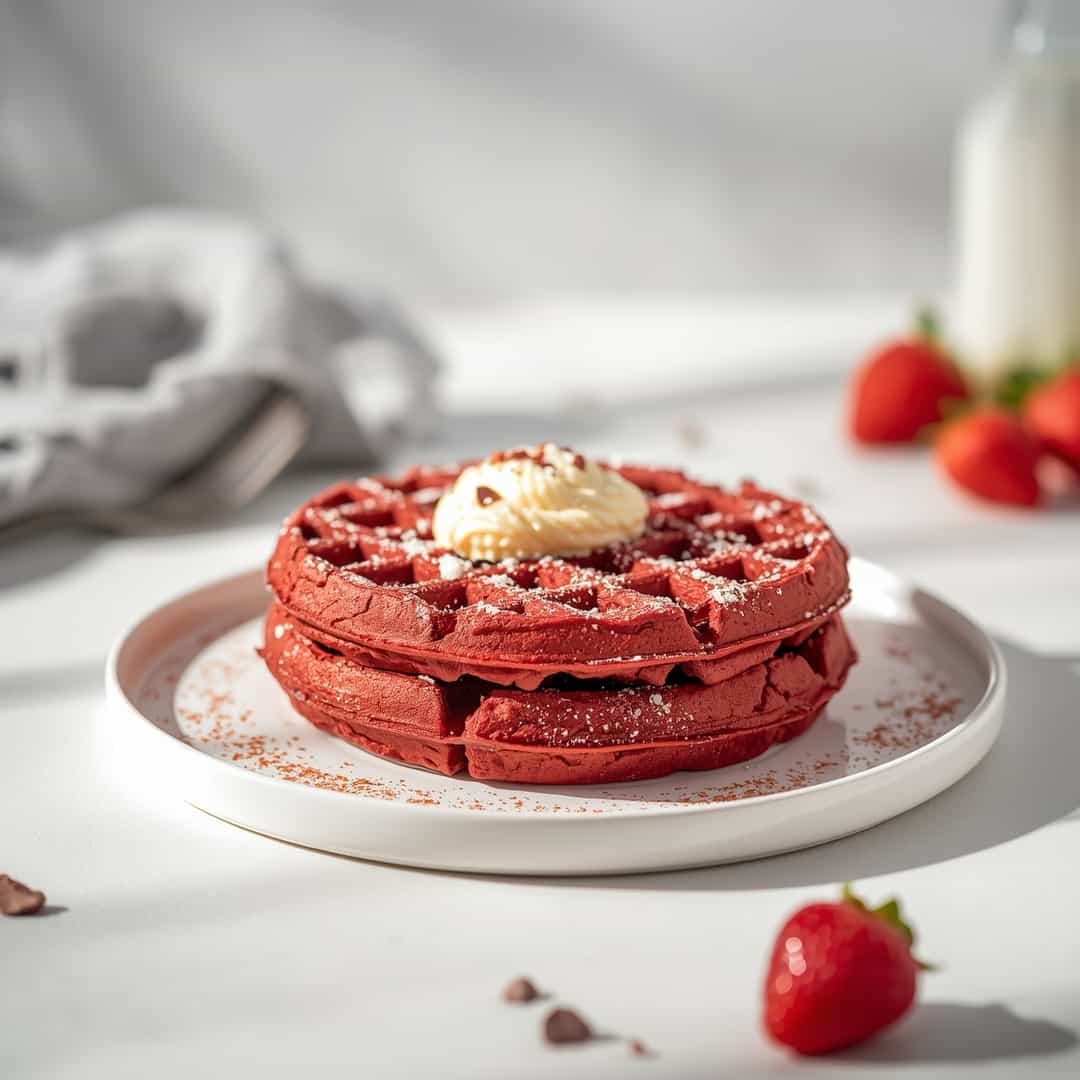
Gluten Free Red Velvet Waffles
Ingredients
Equipment
Method
- Preheat your waffle iron according to the manufacturer’s instructions. Lightly grease it if necessary, even if it’s non-stick.
- Whisk together the dry ingredients in a large mixing bowl. This includes the gluten-free all-purpose flour, granulated sugar, baking powder, baking soda, salt, and unsweetened cocoa powder. Whisking ensures that all the leavening agents and flavorings are evenly distributed, preventing pockets of blandness or uneven rise.1 ½ cups gluten-free all-purpose flour blend, 2 tablespoons granulated sugar, 1 teaspoon baking powder, ½ teaspoon baking soda, ¼ teaspoon salt, 2 tablespoons unsweetened cocoa powder
- In a separate medium bowl, whisk together the wet ingredients. Combine the white vinegar, vegetable oil (or melted butter), unsweetened almond milk, the large egg, and vanilla extract.1 teaspoon white vinegar, 3 tablespoons vegetable oil, 1 cup unsweetened almond milk, 1 large egg, 1 teaspoon vanilla extract
- Add the red food coloring to the wet ingredients. Start with 1 tablespoon and mix well. If you desire a more intense red color, add the second tablespoon and mix again until you achieve your preferred vibrant hue. The vinegar in the batter reacts with the baking soda, contributing to the waffle’s fluffiness and helping to activate the red color for a deeper shade.1-2 tablespoons red food coloring
- Pour the wet ingredients into the dry ingredients. Stir gently until just combined. Be careful not to overmix, as this can lead to tough waffles, especially in gluten-free baking. A few small lumps are perfectly fine.
- Let the batter rest for about 5 minutes. This brief resting period allows the gluten-free flours to hydrate, leading to a better texture.
- Pour the batter onto the preheated waffle iron. The amount of batter needed will vary depending on the size and type of your waffle iron. Generally, about ½ to ¾ cup per waffle is a good starting point.
- Cook the waffle until golden brown and cooked through. This typically takes between 4 and 7 minutes per waffle, depending on your waffle iron’s settings. The steam should subside, and the waffle will usually lift away easily when done.
- Carefully remove the waffle from the iron using a fork or spatula and place it on a wire rack to keep it crisp. Repeat with the remaining batter, re-greasing the waffle iron if needed between batches.