
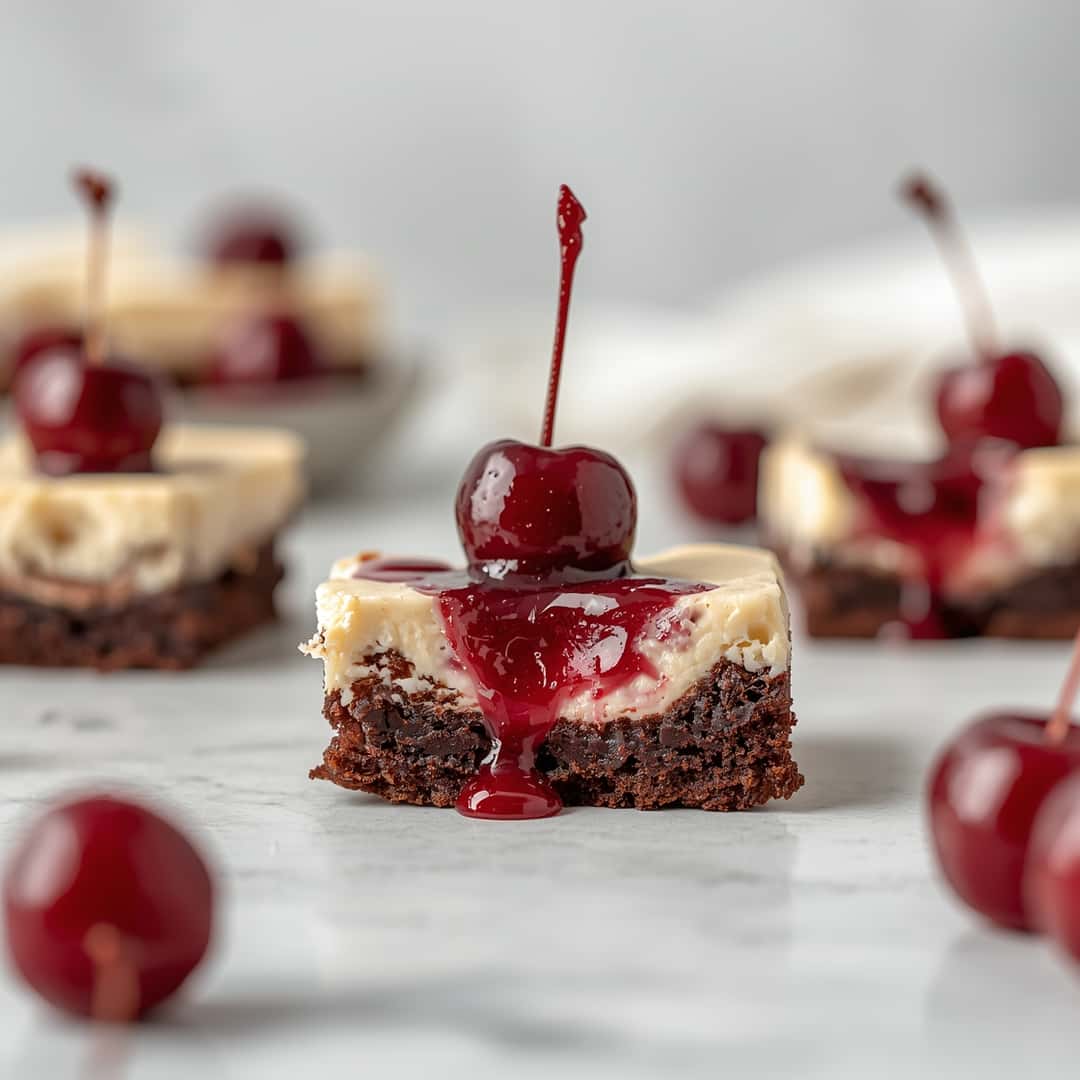
Get ready to experience pure bliss with these incredible Cherry Cheesecake Brownies, a dessert that perfectly marries the rich decadence of fudgy brownies with the tangy sweetness of creamy cheesecake and juicy cherries. This recipe is your shortcut to a show-stopping dessert that’s surprisingly easy to whip up, making it ideal for any occasion, from a casual weeknight treat to a festive gathering.
Key Ingredients for Cherry Cheesecake Brownies
For the Brownie Base:
- 1 cup (2 sticks) unsalted butter, melted
- 2 cups granulated sugar
- 1 teaspoon vanilla extract
- 4 large eggs
- 1 cup all-purpose flour
- ⅓ cup unsweetened cocoa powder
- ½ teaspoon baking powder
- ¼ teaspoon salt
- 1 cup semi-sweet chocolate chips (optional, for extra chocolatey goodness)
For the Cherry Cheesecake Swirl:
- 8 ounces cream cheese, softened
- ½ cup granulated sugar
- 1 large egg
- 1 teaspoon vanilla extract
- 1 cup cherry pie filling (from a can or homemade)
How to Make Cherry Cheesecake Brownies
Prepare to delight your taste buds with a dessert that’s both incredibly simple and unbelievably delicious. These Cherry Cheesecake Brownies boast a fudgy, intense chocolate brownie base swirled with a luscious, tangy cherry cheesecake topping, creating a symphony of flavors and textures in every bite. With a hands-on preparation time of about 25 minutes and a baking time of 30-35 minutes, this recipe is your ticket to gourmet dessert perfection without the fuss.
Step-by-Step Instructions
Step 1: Preheat and Prepare. Preheat your oven to 350°F (175°C). Grease and flour a 9×13 inch baking pan, or line it with parchment paper, leaving an overhang on the sides for easy lifting later. This step ensures your brownies won’t stick!
Step 2: Mix the Brownie Batter. In a large bowl, whisk together the melted butter and 2 cups of granulated sugar until well combined. Stir in 1 teaspoon of vanilla extract. Beat in the 4 large eggs, one at a time, until the mixture is smooth and glossy.
Step 3: Add Dry Ingredients for Brownies. In a separate medium bowl, whisk together the 1 cup of all-purpose flour, ⅓ cup of unsweetened cocoa powder, ½ teaspoon of baking powder, and ¼ teaspoon of salt. Gradually add the dry ingredients to the wet ingredients, mixing on low speed or with a spatula until just combined. Be careful not to overmix the batter, as this can lead to tough brownies. If using, gently fold in the 1 cup of semi-sweet chocolate chips.
Step 4: Prepare the Cheesecake Mixture. In a medium bowl, beat the 8 ounces of softened cream cheese with ½ cup of granulated sugar until smooth and creamy. Beat in the 1 large egg and 1 teaspoon of vanilla extract until just combined. Again, avoid overmixing.
Step 5: Assemble the Brownies. Spoon about two-thirds of the brownie batter evenly into the prepared baking pan. Spread the cheesecake mixture over the brownie batter, ensuring it reaches close to the edges. Dollop the remaining brownie batter over the cheesecake layer randomly.
Step 6: Create the Swirl. Using a knife or a skewer, gently swirl the brownie batter into the cheesecake layer. Be creative with your swirls! Don’t over-swirl, or the layers will blend too much.
Step 7: Add the Cherry Pie Filling. Carefully spoon the 1 cup of cherry pie filling over the swirled brownie and cheesecake layers. You can dollop it in larger spoonfuls or spread it more thinly, depending on your preference for cherry bursts.
Step 8: Bake to Perfection. Bake for 30-35 minutes, or until the edges are set and a toothpick inserted into the center comes out with moist crumbs attached (not wet batter). The cheesecake topping should look set.
Step 9: Cool and Cut. Let the Cherry Cheesecake Brownies cool completely in the pan on a wire rack. This is crucial for them to set properly and for clean cuts. Once cooled, use the parchment paper overhang to lift the brownies out of the pan, and then cut them into squares.
Why You’ll Love This Cherry Cheesecake Brownies
You’re going to absolutely adore these Cherry Cheesecake Brownies for a multitude of reasons! The star attraction is undoubtedly the sensational contrast between the intensely fudgy, rich chocolate brownie base and the luxuriously creamy, tangy cherry cheesecake swirl. This delightful duo creates a flavor explosion that’s far more exciting than a plain brownie, offering a sophisticated twist reminiscent of a high-end bakery treat, but at a fraction of the cost. The burst of bright, sweet cherries throughout adds another layer of deliciousness that makes every bite an adventure.
Forget expensive dessert outings; making these Cherry Cheesecake Brownies at home provides an incredibly satisfying and cost-effective way to indulge your sweet cravings. They’re perfect for gifting, potlucks, or simply enjoying as a special weekend treat without breaking the bank. The addition of luscious cherries and the smooth cheesecake topping elevate these beyond ordinary brownies, transforming them into a truly memorable dessert. So, are you ready to bake up some happiness? Try this recipe today and experience the magic for yourself!
Storing and Reheating Tips
Proper storage is key to keeping your delicious Cherry Cheesecake Brownies fresh and enjoyable. Once completely cooled, you can store them in an airtight container at room temperature for up to 2 days. For longer storage, refrigerate the brownies in an airtight container for up to 5 days. The cheesecake element will firm up nicely in the fridge.
To freeze your Cherry Cheesecake Brownies, it’s best to cut them into individual portions before freezing. Wrap each brownie tightly in plastic wrap, then place them in a freezer-safe container or a heavy-duty freezer bag. Frozen brownies will maintain their quality for up to 2-3 months. To reheat, you can enjoy them chilled straight from the refrigerator, or gently warm them in a microwave for 10-20 seconds per brownie for a gooey, decadent treat. If reheating from frozen, allow them to thaw in the refrigerator overnight before gently warming.
Final Thoughts
These Cherry Cheesecake Brownies are an absolute showstopper, offering an irresistible combination of rich chocolate and creamy, fruity cheesecake. They’re incredibly rewarding to make at home, proving that gourmet desserts don’t have to be complicated. We encourage you to dive in and experience the joy of baking and tasting these delightful treats!
Cherry Cheesecake Brownies
Ingredients
Equipment
Method
- Preheat your oven to 350°F (175°C). Grease and flour a 9×13 inch baking pan, or line it with parchment paper, leaving an overhang on the sides for easy lifting later.
- In a large bowl, whisk together the melted butter and 2 cups of granulated sugar until well combined. Stir in 1 teaspoon of vanilla extract. Beat in the 4 large eggs, one at a time, until the mixture is smooth and glossy.1 cup unsalted butter, melted, 2 cups granulated sugar, 1 teaspoon vanilla extract, 4 large eggs
- In a separate medium bowl, whisk together the 1 cup of all-purpose flour, ⅓ cup of unsweetened cocoa powder, ½ teaspoon of baking powder, and ¼ teaspoon of salt. Gradually add the dry ingredients to the wet ingredients, mixing on low speed or with a spatula until just combined. If using, gently fold in the 1 cup of semi-sweet chocolate chips.1 cup all-purpose flour, ⅓ cup unsweetened cocoa powder, ½ teaspoon baking powder, ¼ teaspoon salt, 1 cup semi-sweet chocolate chips
- In a medium bowl, beat the 8 ounces of softened cream cheese with ½ cup of granulated sugar until smooth and creamy. Beat in the 1 large egg and 1 teaspoon of vanilla extract until just combined.8 ounces cream cheese, softened, ½ cup granulated sugar, 1 large egg, 1 teaspoon vanilla extract
- Spoon about two-thirds of the brownie batter evenly into the prepared baking pan. Spread the cheesecake mixture over the brownie batter, ensuring it reaches close to the edges. Dollop the remaining brownie batter over the cheesecake layer randomly.
- Using a knife or a skewer, gently swirl the brownie batter into the cheesecake layer. Be creative with your swirls! Don’t over-swirl, or the layers will blend too much.
- Carefully spoon the 1 cup of cherry pie filling over the swirled brownie and cheesecake layers. You can dollop it in larger spoonfuls or spread it more thinly, depending on your preference for cherry bursts.1 cup cherry pie filling
- Bake for 30-35 minutes, or until the edges are set and a toothpick inserted into the center comes out with moist crumbs attached (not wet batter). The cheesecake topping should look set.
- Let the Cherry Cheesecake Brownies cool completely in the pan on a wire rack. Once cooled, use the parchment paper overhang to lift the brownies out of the pan, and then cut them into squares.