
Cherry Cream Cheese Danish recipes deliver a delightful combination of flaky pastry, creamy filling, and sweet fruit, perfect for a satisfying breakfast, brunch, or dessert. This recipe is useful because it offers a bakery-quality treat that’s surprisingly simple to recreate in your own kitchen.
Key Ingredients for Cherry Cream Cheese Danish:
- 1 sheet (about 10 oz) frozen puff pastry, thawed according to package directions
- 4 oz cream cheese, softened
- 1/4 cup granulated sugar
- 1 large egg yolk
- 1 teaspoon vanilla extract
- 1/2 cup cherry pie filling (or fresh pitted cherries simmered with a little sugar and cornstarch)
- 1 tablespoon milk
- 1 tablespoon granulated sugar (for topping)
- Optional: Powdered sugar for dusting
How to Make Cherry Cream Cheese Danish:
Get ready to be impressed by how easy and incredibly delicious these Cherry Cream Cheese Danishes are! In under an hour, you’ll be indulging in a pastry that boasts a wonderfully rich and creamy center perfectly complemented by a burst of sweet cherry goodness. The crisp, golden puff pastry adds a satisfying textural contrast, making each bite a pure delight. This recipe is perfect for a quick morning treat or an elegant dessert without the fuss.
Step-by-Step Instructions:
- Prepare the Puff Pastry: Preheat your oven to 400°F (200°C). Line a baking sheet with parchment paper. Gently unfold the thawed puff pastry sheet onto a lightly floured surface. If your pastry is rectangular, you can leave it as is or cut it into two equal squares for smaller danishes. Score a border about 1/2 inch from the edge of each pastry piece, being careful not to cut all the way through. This border will help create the classic Danish shape. Use a fork to prick the interior of the pastry within the scored border a few times.
- Make the Cream Cheese Filling: In a medium bowl, combine the softened cream cheese and 1/4 cup granulated sugar. Beat with an electric mixer until smooth and creamy. Beat in the egg yolk and vanilla extract until well combined. This creates a lusciously smooth and slightly tangy filling that perfectly balances the sweetness of the cherries.
- Assemble the Danishes: Spoon about 1 tablespoon of the cream cheese mixture into the center of each pastry piece, staying within the scored border. Top the cream cheese mixture with about 1 tablespoon of cherry pie filling. You want enough to cover the cream cheese but not so much that it overflows during baking.
- Egg Wash and Sugar Topping: In a small bowl, whisk together the 1 tablespoon of milk and 1 tablespoon of granulated sugar. Brush this mixture lightly over the scored edges of the puff pastry. This will help the pastry turn a beautiful golden brown and add a touch of sweetness.
- Bake to Golden Perfection: Carefully transfer the assembled danishes to the prepared baking sheet. Bake for 15-20 minutes, or until the puff pastry is golden brown, puffed up, and cooked through, and the filling is warm. Keep an eye on them to prevent burning.
- Cool and Serve: Once baked, remove the danishes from the oven and let them cool on the baking sheet for a few minutes before transferring them to a wire rack to cool completely. This cooling period allows the filling to set slightly. Optionally, dust with powdered sugar before serving for an extra touch of elegance.
Why You’ll Love This Cherry Cream Cheese Danish:
You’ll fall in love with these Cherry Cream Cheese Danish because they deliver that irresistible bakery-fresh taste and texture right in your own kitchen, saving you money compared to store-bought versions. The star of this danish is the delightful contrast between the rich, tangy cream cheese filling and the sweet, slightly tart cherry topping, all enveloped in impossibly flaky, buttery puff pastry. It’s a flavor and texture combination that’s truly divine, reminiscent of, but often more satisfying than, a simple fruit tart.
These danishes are more than just a treat; they’re an experience. Imagine the aroma filling your kitchen as they bake, then the first bite of warm, crisp pastry giving way to a decadent creamy center and a burst of juicy cherries. It’s the perfect way to elevate your morning routine or impress guests with minimal effort. So, why not ditch the bakery line and whip up a batch of these heavenly Cherry Cream Cheese Danishes this weekend?
Storing and Reheating Tips:
For optimal freshness, store any leftover Cherry Cream Cheese Danishes in an airtight container in the refrigerator. They will stay delicious for up to 3-4 days. If you plan to enjoy them more than a day or two later, freezing is a great option. Allow the danishes to cool completely, then wrap them individually in plastic wrap, followed by a layer of aluminum foil or place them in a freezer-safe bag. They can be frozen for up to 2-3 months.
To reheat, simply place the refrigerated danishes on a baking sheet and warm them in a preheated oven at 350°F (175°C) for 5-10 minutes, or until they are heated through and the pastry is crisp again. If reheating from frozen, you may need an additional 5-10 minutes. You can also gently warm them in a toaster oven or a dry skillet over low heat for a quicker, though potentially less crisp, result.
Final Thoughts:
This Cherry Cream Cheese Danish recipe is a testament to how simple ingredients can create something truly spectacular. We encourage you to give this delightful treat a try for a taste of homemade bliss that’s sure to become a new favorite.
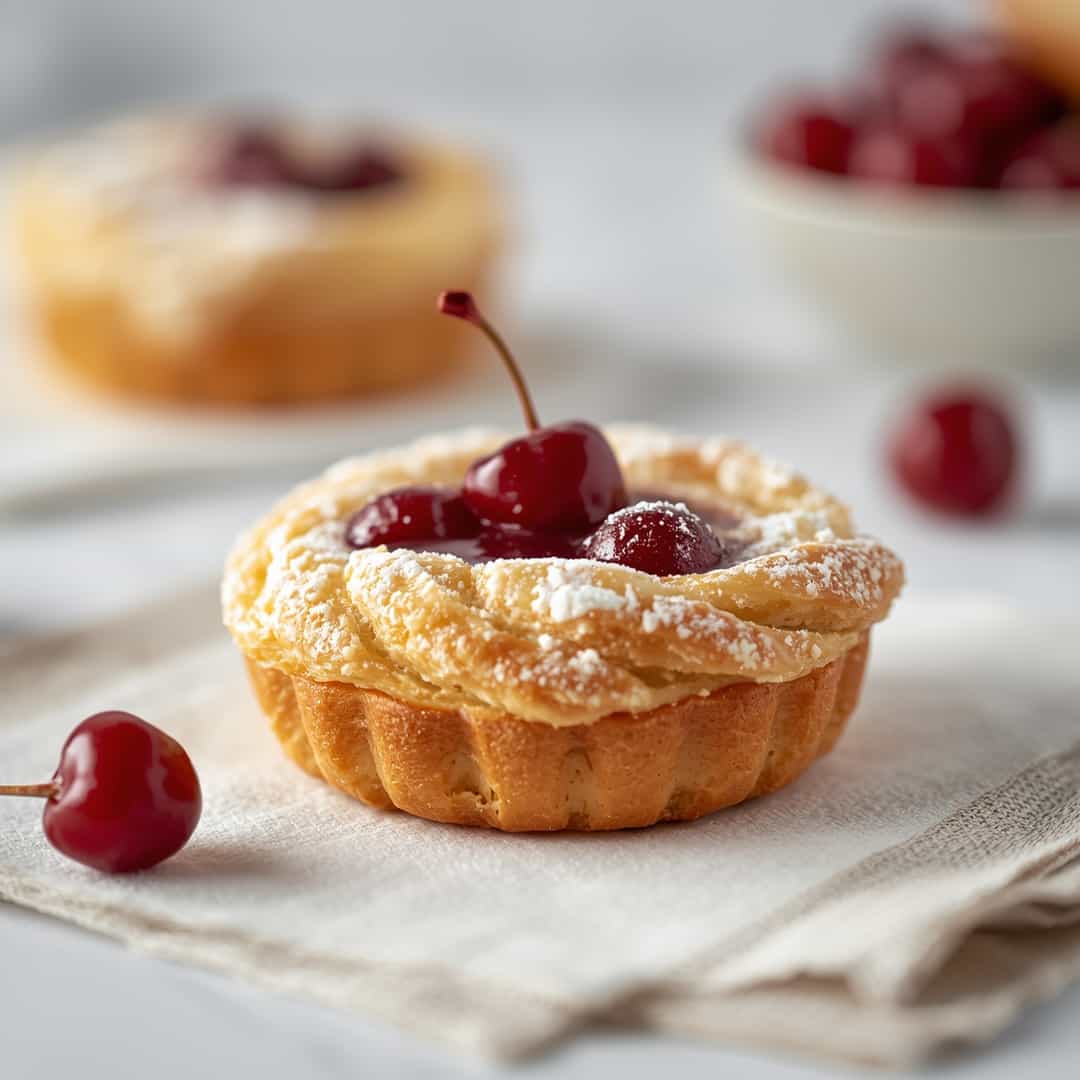
Cherry Cream Cheese Danish
Ingredients
Equipment
Method
- Preheat your oven to 400°F (200°C). Line a baking sheet with parchment paper. Gently unfold the thawed puff pastry sheet onto a lightly floured surface. If your pastry is rectangular, you can leave it as is or cut it into two equal squares for smaller danishes. Score a border about 1/2 inch from the edge of each pastry piece, being careful not to cut all the way through. This border will help create the classic Danish shape. Use a fork to prick the interior of the pastry within the scored border a few times.1 sheet frozen puff pastry
- In a medium bowl, combine the softened cream cheese and 1/4 cup granulated sugar. Beat with an electric mixer until smooth and creamy. Beat in the egg yolk and vanilla extract until well combined. This creates a lusciously smooth and slightly tangy filling that perfectly balances the sweetness of the cherries.4 oz cream cheese, 1/4 cup granulated sugar, 1 large egg yolk, 1 teaspoon vanilla extract
- Spoon about 1 tablespoon of the cream cheese mixture into the center of each pastry piece, staying within the scored border. Top the cream cheese mixture with about 1 tablespoon of cherry pie filling. You want enough to cover the cream cheese but not so much that it overflows during baking.1/2 cup cherry pie filling
- In a small bowl, whisk together the 1 tablespoon of milk and 1 tablespoon of granulated sugar. Brush this mixture lightly over the scored edges of the puff pastry. This will help the pastry turn a beautiful golden brown and add a touch of sweetness.1 tablespoon milk, 1 tablespoon granulated sugar
- Carefully transfer the assembled danishes to the prepared baking sheet. Bake for 15-20 minutes, or until the puff pastry is golden brown, puffed up, and cooked through, and the filling is warm. Keep an eye on them to prevent burning.
- Once baked, remove the danishes from the oven and let them cool on the baking sheet for a few minutes before transferring them to a wire rack to cool completely. This cooling period allows the filling to set slightly. Optionally, dust with powdered sugar before serving for an extra touch of elegance.Powdered sugar