
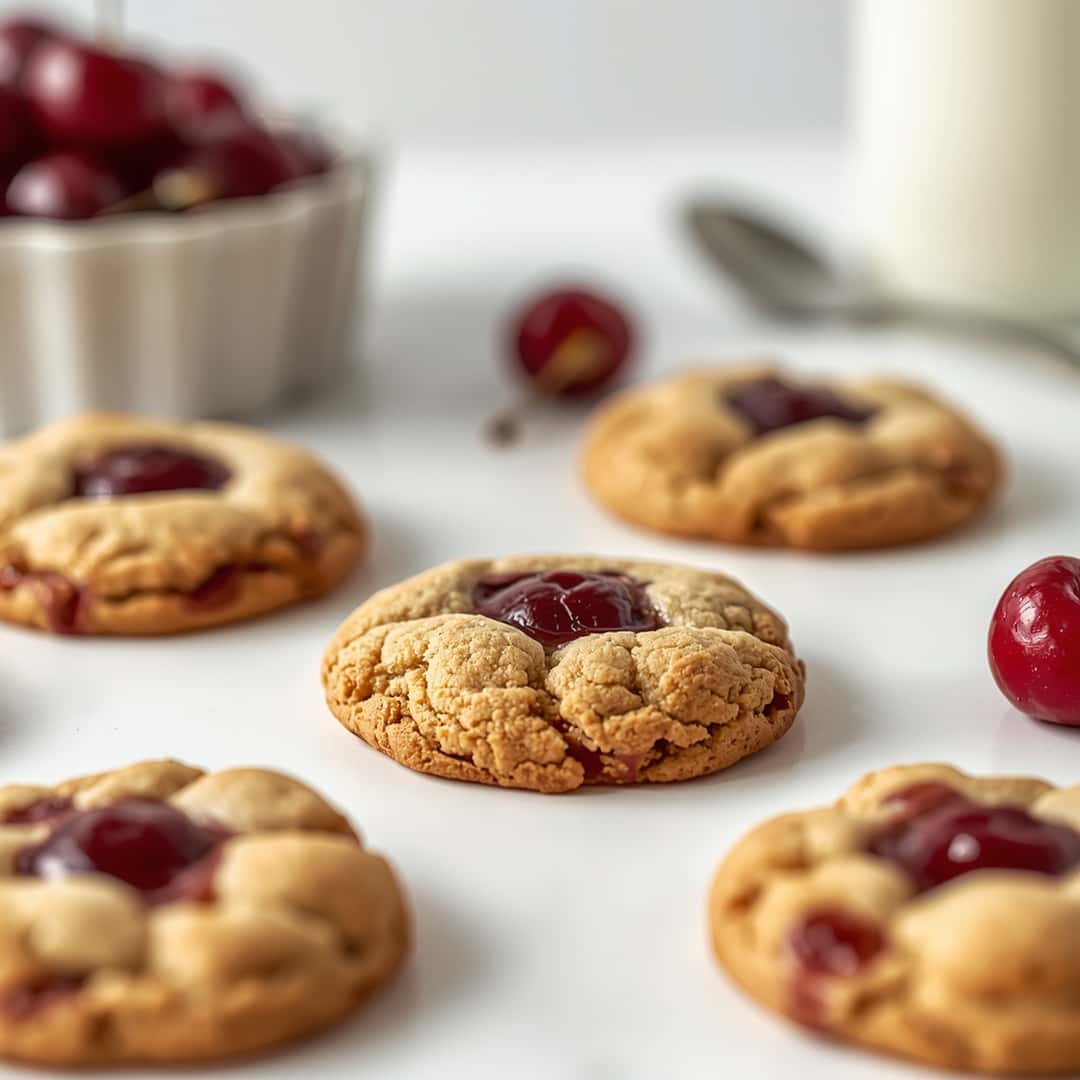
Cherry Pie Cookies are a delightful shortcut to enjoying all the classic flavors of a cherry pie in an easy-to-grab, portable cookie form. These delightful treats are perfect for satisfying your sweet cravings with minimal fuss, making them a must-try for any home baker.
Key Ingredients for Cherry Pie Cookies
- 1 cup (2 sticks or 226g) unsalted butter, softened
- 1 cup (200g) granulated sugar
- 1 large egg, at room temperature
- 1 teaspoon vanilla extract
- 2 ½ cups (312g) all-purpose flour
- 1 teaspoon baking soda
- ½ teaspoon salt
- 1 jar (about 21 ounces or 595g) cherry pie filling, divided
- Optional: Powdered sugar or a simple glaze for dusting
How to Make Cherry Pie Cookies
Get ready for a simple yet incredibly satisfying baking experience! These Cherry Pie Cookies deliver all the comforting taste of a homemade cherry pie with the ease of a drop cookie. With a prep time of around 20 minutes and a bake time of 12-15 minutes, you’ll have these delightful treats ready to enjoy in no time. The secret lies in incorporating swirls of sweet cherry pie filling directly into a tender, buttery cookie dough, creating a soft center and perfectly chewy edges.
Step-by-Step Instructions
Preheat your oven and prepare your baking sheets: Preheat your oven to 350°F (175°C). Line two large baking sheets with parchment paper or silicone baking mats to prevent sticking and ensure even baking.
Cream the butter and sugar: In a large mixing bowl, beat together the softened unsalted butter and granulated sugar using an electric mixer (or by hand if you prefer a bit of a workout) until light and fluffy. This process typically takes about 2-3 minutes.
Incorporate the wet ingredients: Add the large egg and vanilla extract to the butter and sugar mixture. Beat again until well combined and the mixture is smooth.
Combine the dry ingredients: In a separate medium bowl, whisk together the all-purpose flour, baking soda, and salt until thoroughly combined. This ensures the leavening agents and salt are evenly distributed throughout the dry ingredients.
Gradually add dry to wet ingredients: With the mixer on low speed, gradually add the flour mixture to the wet ingredients, mixing just until combined. Be careful not to overmix the dough, as this can result in tough cookies.
Prepare the cherry filling: Open the jar of cherry pie filling. You’ll want to spoon out a portion of it to swirl into the cookies. If the filling is very chunky, you can gently mash some of the cherries with a fork.
Combine dough and filling: Take about two-thirds of your cookie dough and place it in a large bowl. Add about half of the cherry pie filling to this portion of dough. Gently fold the filling into the dough until it’s mostly incorporated but still has visible swirls. Don’t overmix; you want those beautiful streaks of cherry.
Scoop and swirl: Drop rounded tablespoons of the cherry-swirled dough onto your prepared baking sheets, leaving about 2 inches between each cookie. For an extra burst of cherry flavor and a more pie-like appearance, gently spoon a small dollop of the remaining cherry pie filling onto the top of each cookie dough ball. You can use the back of the spoon to gently swirl it into the surface. The remaining one-third of plain cookie dough isn’t used in this batch, or you can use it to make plain sugar cookies if you wish.
Bake the cookies: Bake for 12-15 minutes, or until the edges of the cookies are lightly golden brown and the centers are set but still appear slightly soft. The cherry filling will bubble up beautifully.
Cool the cookies: Let the Cherry Pie Cookies cool on the baking sheets for a few minutes before carefully transferring them to a wire rack to cool completely. This allows them to firm up.
Optional finishing touch: Once completely cooled, you can dust the cookies with a light layer of powdered sugar for an extra decorative touch and a hint of sweetness, or prepare a simple glaze by whisking powdered sugar with a little milk or lemon juice and drizzling it over the cookies.
Why You’ll Love This Cherry Pie Cookies
You’ll adore these Cherry Pie Cookies because they capture the essence of a warm, comforting cherry pie in a perfectly handheld treat. The star of this recipe is undoubtedly the delightful swirl of sweet and slightly tart cherry filling enveloped in a tender, buttery cookie that’s delightfully chewy. Imagine biting into that perfect balance of crisp edges and a soft, gooey center bursting with berry goodness – it’s pure bliss! Plus, making these cookies at home is incredibly cost-effective compared to buying specialty pastries, allowing you to indulge in a homemade delight without breaking the bank.
These Cherry Pie Cookies are a fantastic alternative to your average chocolate chip or sugar cookie, offering a unique fruity twist that’s both nostalgic and exciting. They’re incredibly easy to whip up, making them an ideal activity for a lazy afternoon or a fun project with kids. The vibrant red cherries peeking through the golden dough make them visually appealing, and the smell that fills your kitchen while they bake is simply irresistible. Don’t wait – gather your ingredients and bake a batch of these delightful Cherry Pie Cookies today!
Storing and Reheating Tips
To keep your Cherry Pie Cookies tasting their best, store them in an airtight container at room temperature for up to 3-4 days. Ensure the cookies are completely cooled before sealing the container to prevent condensation from making them soggy. For longer storage, you can freeze the cooled cookies in a single layer on a baking sheet until firm, then transfer them to a freezer-safe bag or container. They will keep well in the freezer for up to 2-3 months.
To reheat frozen Cherry Pie Cookies, simply place them on a baking sheet and warm them in a preheated oven at 300°F (150°C) for about 5-7 minutes, or until warmed through. This helps to revive their texture and bring back that fresh-baked warmth. If they are just at room temperature and you want them warm, you can pop them in the oven for a couple of minutes.
Final Thoughts
These Cherry Pie Cookies are a simple yet utterly charming way to bring the beloved taste of cherry pie into a convenient cookie format. Give them a try for a delightful homemade treat that’s sure to bring smiles. Happy baking!
Cherry Pie Cookies
Ingredients
Equipment
Method
- Preheat your oven to 350°F (175°C). Line two large baking sheets with parchment paper or silicone baking mats to prevent sticking and ensure even baking.
- In a large mixing bowl, beat together the softened unsalted butter and granulated sugar using an electric mixer (or by hand if you prefer a bit of a workout) until light and fluffy. This process typically takes about 2-3 minutes.1 cup unsalted butter, softened, 1 cup granulated sugar
- Add the large egg and vanilla extract to the butter and sugar mixture. Beat again until well combined and the mixture is smooth.1 large egg, at room temperature, 1 teaspoon vanilla extract
- In a separate medium bowl, whisk together the all-purpose flour, baking soda, and salt until thoroughly combined. This ensures the leavening agents and salt are evenly distributed throughout the dry ingredients.2 ½ cups all-purpose flour, 1 teaspoon baking soda, ½ teaspoon salt
- With the mixer on low speed, gradually add the flour mixture to the wet ingredients, mixing just until combined. Be careful not to overmix the dough, as this can result in tough cookies.2 ½ cups all-purpose flour, 1 teaspoon baking soda, ½ teaspoon salt
- Open the jar of cherry pie filling. You’ll want to spoon out a portion of it to swirl into the cookies. If the filling is very chunky, you can gently mash some of the cherries with a fork.1 jar cherry pie filling, divided
- Take about two-thirds of your cookie dough and place it in a large bowl. Add about half of the cherry pie filling to this portion of dough. Gently fold the filling into the dough until it’s mostly incorporated but still has visible swirls. Don’t overmix; you want those beautiful streaks of cherry.1 jar cherry pie filling, divided
- Drop rounded tablespoons of the cherry-swirled dough onto your prepared baking sheets, leaving about 2 inches between each cookie. For an extra burst of cherry flavor and a more pie-like appearance, gently spoon a small dollop of the remaining cherry pie filling onto the top of each cookie dough ball. You can use the back of the spoon to gently swirl it into the surface. The remaining one-third of plain cookie dough isn’t used in this batch, or you can use it to make plain sugar cookies if you wish.1 jar cherry pie filling, divided
- Bake for 12-15 minutes, or until the edges of the cookies are lightly golden brown and the centers are set but still appear slightly soft. The cherry filling will bubble up beautifully.
- Let the Cherry Pie Cookies cool on the baking sheets for a few minutes before carefully transferring them to a wire rack to cool completely. This allows them to firm up.
- Once completely cooled, you can dust the cookies with a light layer of powdered sugar for an extra decorative touch and a hint of sweetness, or prepare a simple glaze by whisking powdered sugar with a little milk or lemon juice and drizzling it over the cookies.Powdered sugar or a simple glaze for dusting