
Cherry Squares are a delightful and incredibly easy dessert that brings a taste of homemade goodness to any occasion. Perfect for beginners and seasoned bakers alike, this recipe offers a satisfyingly sweet treat that’s both accessible and utterly delicious, making it a go-to for quick desserts and delightful snacks.
Key Ingredients for Cherry Squares
- 2 cups all-purpose flour
- 1 cup granulated sugar, divided
- 1 teaspoon baking powder
- 1/4 teaspoon salt
- 1 cup (2 sticks) unsalted butter, softened
- 1 large egg
- 1 teaspoon vanilla extract
- 1 (21-ounce) can cherry pie filling
- 1/4 cup chopped nuts (optional, for topping)
- Powdered sugar, for dusting (optional)
How to Make Cherry Squares
Prepare for a delightful baking experience with these incredibly easy Cherry Squares. In just 15 minutes of prep time and 30 minutes of baking, you’ll create a satisfying dessert bursting with fruity flavor and a tender, crumbly texture. The secret lies in the simple yet effective layering that allows the sweet cherry filling to shine through.
Step-by-Step Instructions
Preheat and Prepare: Begin by preheating your oven to 375°F (190°C). Grease and flour an 8×8 inch baking pan or line it with parchment paper, ensuring there’s an overhang for easy removal later. This step is crucial for preventing your Cherry Squares from sticking.
Create the Crust Base: In a medium bowl, whisk together the all-purpose flour, 1/2 cup of the granulated sugar, baking powder, and salt. Add the softened unsalted butter to this dry mixture. Using your fingertips, a pastry blender, or a food processor, work the butter into the dry ingredients until the mixture resembles coarse crumbs.
Bind the Dough: In a small bowl, whisk together the large egg and vanilla extract. Add this wet mixture to the crumbly dough. Combine everything until just incorporated, being careful not to overmix. The dough will be slightly sticky.
Form the Base Layer: Press about two-thirds of the dough mixture evenly into the bottom of your prepared baking pan. Ensure you create a solid, even layer to form the base of your Cherry Squares.
Add the Cherry Filling: Open the can of cherry pie filling and spread it evenly over the dough base. Make sure to distribute the cherries and the thick syrup across the entire surface. This rich, fruity layer is what makes these Cherry Squares so irresistible.
Create the Topping: Take the remaining one-third of the dough mixture and crumble it evenly over the cherry pie filling. You can also sprinkle chopped nuts over the topping at this stage if you’re using them for added texture and flavor.
Bake to Golden Perfection: Place the pan in the preheated oven and bake for 25-35 minutes, or until the topping is golden brown and the cherry filling is bubbling around the edges. The aroma filling your kitchen will be a clear sign that your Cherry Squares are nearly ready.
Cool and Serve: Once baked, remove the pan from the oven and let the Cherry Squares cool completely in the pan on a wire rack. This allows them to set properly. Once cooled, you can cut them into squares. For an extra touch, dust with powdered sugar before serving.
Why You’ll Love This Cherry Squares
You’ll adore these Cherry Squares for their incredibly vibrant, sweet-tart cherry filling that bursts with summery flavor, nestled between a tender, buttery crust. This homemade dessert is a fantastic money-saver compared to store-bought treats, proving that deliciousness doesn’t have to break the bank. The simple yet satisfying combination of textures – the crumbly topping and the smooth, fruity center – alongside the optional addition of nuts or a dusting of powdered sugar, elevates these Cherry Squares into something truly special. They offer a comforting taste that rivals even the most elaborate cherry pies, but with a fraction of the effort. Don’t wait to experience the pure joy of these delightful Cherry Squares; whip up a batch today and treat yourself to a little slice of baking heaven.
Storing and Reheating Tips
To keep your delightful Cherry Squares fresh and delicious, store any leftovers in an airtight container at room temperature for up to two days. If you plan to keep them for longer, refrigeration is recommended, where they will stay good for up to a week. For even longer storage, you can freeze Cherry Squares. Ensure they are completely cooled, then wrap them tightly in plastic wrap, followed by aluminum foil, or place them in a freezer-safe container. They can be frozen for up to 2-3 months.
When you’re ready to enjoy frozen or refrigerated Cherry Squares, reheating is simple. For a warm treat, place a square on a microwave-safe plate and heat in 20-30 second intervals until warmed through. Alternatively, you can reheat them in a 300°F (150°C) oven for about 10-15 minutes, which will help crisp up the topping beautifully. If reheating from frozen, allow them to thaw slightly at room temperature before using either the microwave or oven method.
Final Thoughts
These Cherry Squares are a testament to how simple ingredients and a straightforward approach can yield incredibly rewarding results. Their ease of preparation, delightful flavor, and cost-effectiveness make them a must-try for any home baker. Give them a go, and I’m confident you’ll be adding this recipe to your regular rotation.
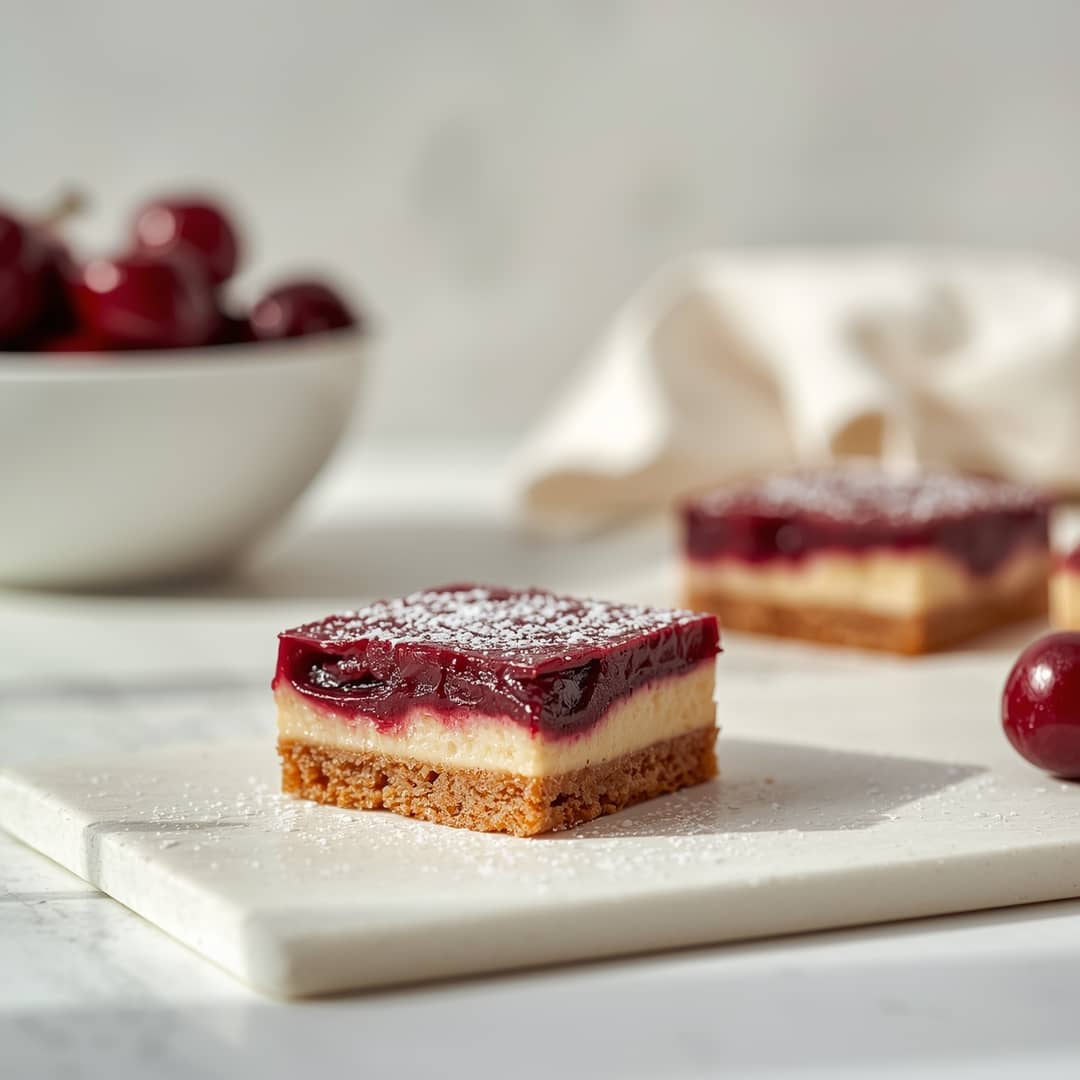
Cherry Squares
Ingredients
Equipment
Method
- Begin by preheating your oven to 375°F (190°C). Grease and flour an 8×8 inch baking pan or line it with parchment paper, ensuring there’s an overhang for easy removal later. This step is crucial for preventing your Cherry Squares from sticking.
- In a medium bowl, whisk together the all-purpose flour, 1/2 cup of the granulated sugar, baking powder, and salt. Add the softened unsalted butter to this dry mixture. Using your fingertips, a pastry blender, or a food processor, work the butter into the dry ingredients until the mixture resembles coarse crumbs.2 cups all-purpose flour, 1 cup granulated sugar, 1 teaspoon baking powder, 1/4 teaspoon salt, 1 cup unsalted butter
- In a small bowl, whisk together the large egg and vanilla extract. Add this wet mixture to the crumbly dough. Combine everything until just incorporated, being careful not to overmix. The dough will be slightly sticky.1 large egg, 1 teaspoon vanilla extract
- Press about two-thirds of the dough mixture evenly into the bottom of your prepared baking pan. Ensure you create a solid, even layer to form the base of your Cherry Squares.
- Open the can of cherry pie filling and spread it evenly over the dough base. Make sure to distribute the cherries and the thick syrup across the entire surface. This rich, fruity layer is what makes these Cherry Squares so irresistible.1 (21-ounce) can cherry pie filling
- Take the remaining one-third of the dough mixture and crumble it evenly over the cherry pie filling. You can also sprinkle chopped nuts over the topping at this stage if you’re using them for added texture and flavor.1/4 cup chopped nuts
- Place the pan in the preheated oven and bake for 25-35 minutes, or until the topping is golden brown and the cherry filling is bubbling around the edges. The aroma filling your kitchen will be a clear sign that your Cherry Squares are nearly ready.
- Once baked, remove the pan from the oven and let the Cherry Squares cool completely in the pan on a wire rack. This allows them to set properly. Once cooled, you can cut them into squares. For an extra touch, dust with powdered sugar before serving.powdered sugar